Episode 252: houseplant pot hacks
Subscribe to On The Ledge via Spotify, Apple Podcasts, Player FM, Stitcher, Overcast, RadioPublic and YouTube.
TRANSCRIPT
Jane Perrone 00:15
Hello and welcome to On The Ledge podcast and this week we're talking about pot hacks. Not that kind of pot.
Jane Perrone 00:24
Hello and welcome to On The Ledge podcast, your source of sound, sensible, scientific houseplant advice since 2017. I'm your host, Jane Perrone. And in this week's show, I'm talking about my top pot hacks. Plus, I answer a question about a sad looking avocado plant.
Jane Perrone 00:56
Thank you to Beth and Kathy who both became Ledge Ends this week, joining the clan of Patreon supporters who keep this show going from week to week with their regular donations. You can also give a one off donation via ko-fi.com. And if you've never left a review for On The Ledge, then please do that too because it really helps people find the show. I found my first review on Amazon the other day, which is rather exciting. You can get my podcast On The Ledge, and my new audiobook, The Allotment Keepers Handbook from Audible. And you can also listen to both of those on Spotify, as well. Do leave a review if you can. If you make it funny, I'll probably read it out on the show. All the information about how to support On The Ledge can be found in the show notes at janeperrone.com.
Jane Perrone 01:57
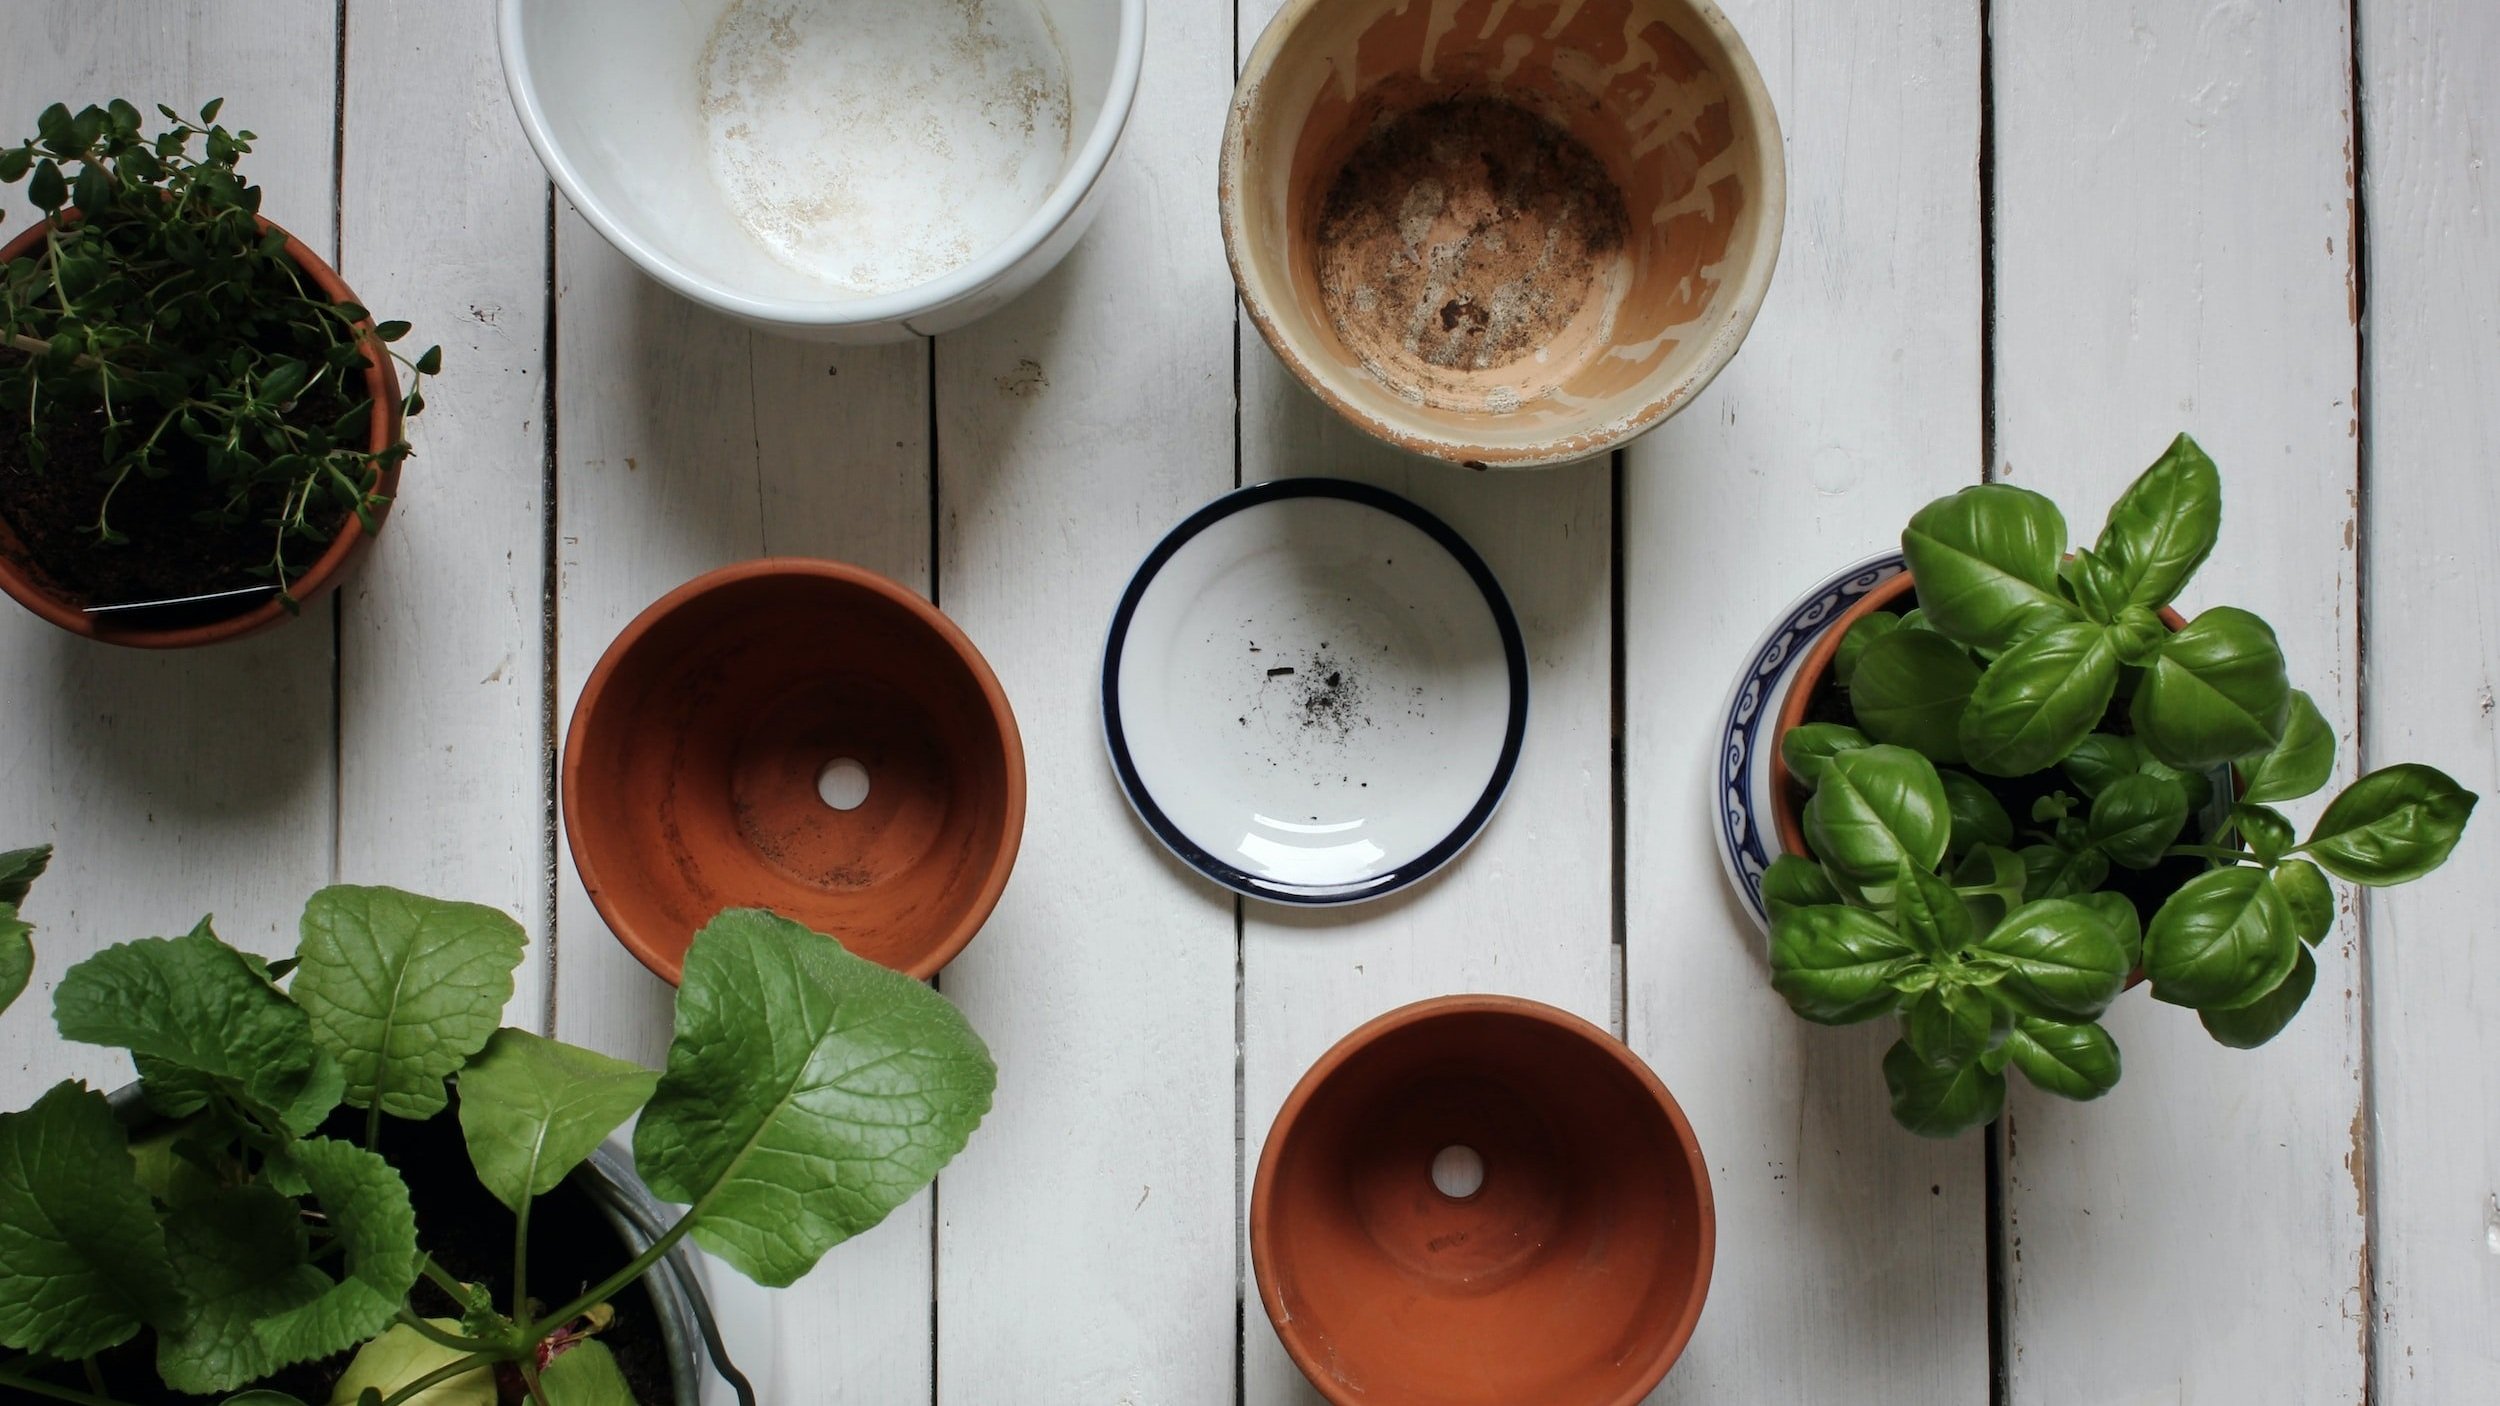
Plant pots can be problematic. I know not everything in this podcast is going to alliterate, hopefully anyway, but I wanted to bring you a few suggestions for dealing with common pot-related problems with your house plants. Over the years I've grappled with all kinds of issues and wanted to bring you my condensed wisdom on this subject. I'm sure that there will be lots of other suggestions from listeners. So at the end of this if you think I've missed anything out, do drop me a line so I can include your tips in future episodes. First, a few definitions. We're talking about pots we're not talking about pot aka Cannabis sativa. In this episode, it's not legal in the UK where I am to grow it I know it is where some of you live. And maybe that's a topic we'll tackle at some point in an upcoming episode. But this week, we're talking about pots of all kinds.
Jane Perrone 02:56
From cachepots, the outer pot or cover pot that you might use to disguise a plants nursery pot. That just means the pot that the plant comes in from the nursery, it's usually not very exciting looking. It's most usually made of plastic, either black or brown. Occasionally pink and white I have got a few unusually coloured pots. Or these days increasingly from clear plastic. So we're going to be talking about hacks for nursery pots and cachepots in this episode. And if like me, you have looked at cachepots in fancy shops and garden centres and thought, Gosh, I really can't afford enough cachepots for the number of house plants you have. It's time to get creative. I use all kinds of things for cachepots, but I do find there's a problem. And that is that oftentimes cachepots, ones you buy new and ones you want to repurpose, have the wrong ratio of height to width. In other words, they're shallow and wide. And that doesn't really fit with the shape of the nursery pot that you most often are dealing with. So here's a suggestion what to do in that circumstance. The easiest option if you want to keep that two container situation where you've got an outer pot and an inner pot so that you can water without causing problems and you can also hide an inner pot. The solution is to do something with the nursery pot rather than doing something with the outer pot. And the very simplest solution, it's quick and dirty, is to just get a big old pair of scissors and cut the nursery pot down to size. You could also use a little junior hacksaw if you have one of those. Anything that can safely cut around the rim of the pot. You might want to just then sand down if it's made a load of sharp edges You might want to sand down the top. And then you can adjust that to the height of the cachepot so that it's the right height. And then put your plant in there.
Jane Perrone 05:08
You might end up then with a situation where the nursery port has a lot of space around it. And again, you can be creative here, you can stack a load of stones or dry moss or gravel or just dry substrate in that gap to fill it up and cover over the big gap. If you've got a plant that's already in a nursery pot, and you're wondering how you can do this, well, oftentimes it can be as simple as taking the root ball out of that nursery pot, cutting it down to size, and then literally just slicing the bottom off your root ball. Sounds brutal, but usually, unless the plant is absolutely tiny, if it's reasonably well established, most plants will be absolutely fine with this and will not have a major problem then you can just put the root ball back in the container. You know there is the idea that plants need endless repotting. But actually, a lot of the time with professional growers and people who've been in the business a long time, you might find that they end up just taking the plant out of its pot, root trimming and putting it back into the same pot with some fresh substrate if they want to keep the plant the same size and they don't want to continuously upgrade that pot size.
Jane Perrone 06:22
The other thing you can do if you're looking for a different shaped container that will work with your cachepot is raid your recycling, look for deli pots and other containers, other plastic containers that would fit into your cachepot and it's a bit of a mix and match. It's a bit of a game of Tetris, you're going to have to try different pots in there. Don't worry if they don't have any drainage, you can easily add drainage holes to pots that you might be wanting to use as houseplant containers. You know, just use a sharp I think they're called bradawls in the UK, it's like a pointed thing that you make a hole into wood with. You can use those to punch holes in the bottom of pots, you can carefully use a pair of scissors, go large on the holes, either lots of tiny ones or one large one, I prefer lots of little tiny holes across the base of the pot, it really helps with drainage, and then fit that into your cachepot. Generally those containers are a little bit less sturdy than a traditional nursery pot, the plastic involved is probably a bit more flimsy. So just bear that in mind when you are working with these, that you just have to be a little bit careful when you're making those holes. And they tend to crack more easily as well but they're definitely worth using if you have them lying around. Why not, if they fit that awkwardly sized cachepot that you're dealing with. And this is even worth doing with traditional nursery pots that you've otherwise kept the same height.
Jane Perrone 07:53
This is a tip actually that I got from a listener Tom Cranham, who is a real Begonia grower. And he sent me a plant and it was in a pot where it was just a standard nursery's pot but he'd added extra holes to the sides and the base and, great idea because that meant that there was more air circulation around those roots, which is just what that Begonia needed. So if you don't want to buy a special net pots for plants, you could just punch some extra holes into your nursery pot and aid air circulation which is very useful for things like Begonias and also some Orchids. There is another way forward with cachepots though, if you want your plant to look beautiful and you don't want any prospect of that plastic nursery pot being visible, you can take your cachepot and turn it into a pot with drainage. I wouldn't recommend doing this with any family heirlooms. Because, you know, I mean, there is a risk that it will all go horribly wrong, and your pot will crack, will be irreparably damaged. But I've done a couple of different techniques for making holes in the bottom of pots made of things like porcelain, china, terracotta and it's worked extremely well. There are two methods I would recommend. And both of these methods are suitable for people like me with literally zero DIY skills.
Jane Perrone 09:24
Method one, you need the following: a decent sized bucket, a Phillips head screwdriver of a reasonably chunky size, one that you don't, aren't really feeling precious about. So the Phillips head screwdriver that's the one with the like star tip rather than the flat tip. One of those and then finally, a hammer of some sort. And it's quite simple. Fill the bucket with water. Get your chosen pot. Put a rag inside it sorry I forgot to mention the rag. Get an old rag, an old piece of fabric, doesn't matter what it is. Stuff it inside the pot, then place the pot into the water with the base facing upwards. And make sure there's no air holes under the pot, that have been captured under the pot. Make sure the pot is fully underwater, then carefully take your Phillips head screwdriver and place that at the point where you want a hole to be created. So you're going to be kind of working semi underwater at this point, get your hammer and tap tap tap on the Phillips head screwdriver until it goes through and makes a hole in the bottom of the pot, then repeat. It sounds remarkable, but it really does work it, I've done it for many different kinds of pot either plain terracotta, glazed terracotta, finer kind of china and porcelain things, it's worked a treat, I can't promise that absolutely everything won't break. So again, no heirloom pieces, no pieces that you're going to cry about if they do get broken, but it works amazingly well. You might find depending on the material that on the inside of the pot, you get some flaking, particularly I think on terracotta this happens, don't put the holes too close together. You don't want to cave in the whole bottom of the pot. But you should find that you can make a substantial number of holes this way. And it's super easy.
Jane Perrone 11:21
Method two. For this method, you need a drill, and you need to go out and buy some ceramic drill bits. So I'm terrified of like going into DIY stores. But again, just go into a DIY store, say I need ceramic drill bits. They will be able to set, hit you up with one or two of these, find one that's the right diameter for the holes you want to make. They're like a normal drill bit, but they have kind of wings coming out that allow them to work on cutting things like ceramic tiles, but you're going to use them for your pots. So get that drill bit loaded into your drill. Place the pot base upwards on a padded surface. So I just usually again, get my trusty rag or whatever old cushion and place the pot onto there, make a mark where you want the holes to be. And then wet the surface that helps to keep the drill from getting too hot. And then drill holes through the bottom of the pot. It will depend how thick those pot bases are as to how difficult that is and how long it takes you. I've done it with massively thick terracotta, and very fine stuff. And it seems to work really, really well. I'd say err on the side of smaller holes, if you're worried about using it on very fine, thin pieces of pottery. And then make those holes. It will heat up, so just make sure that you have a chance for things to cool off in between. But it really does work a treat. I say that as somebody who's terrified of drills and terrified of DIY, I found it so easy. And once you've bought, it'll probably cost you like five to 10 dollars/pounds to buy those drill bits, very basic ones, and you'll have them forever to use over and over again. If you want a bit more of assistance with the drilling part. You can also put a piece of tape over the bottom and mark out you're, you're drilling hole too some people do that but I don't bother with that it works perfectly well without it and drill away to your heart's content. Once you've done that, you've then created a china or pottery or terracotta version of your nursery pot. All you need then is some kind of saucer underneath to catch the drainage. And again, this is where you can be really inventive. One of the things I always do if I see abandoned microwaves, is you know the glass tray in microwaves. That's a really good drip tray. Because it's glass it kind of melts into the background you don't really see it, but it's it's durable, and you can sit a pot on top of there and it won't mark your floor. You can use saucers from the thrift store, old saucers of your own. You can buy terracotta saucers, the world is your oyster. If you do buy terracotta saucers though, remember that oftentimes these are porous and you will need to apply an acrylic, clear acrylic spray to the surface to make sure that they become waterproofed.
Jane Perrone 14:29
If you do you have any cachepots that you want to use without a nursery pot, but are just too precious to add drainage holes to or perhaps they're made out of a material that you don't think you can pierce. For example a brass jardiniere or similar. I picked up a really good tip from Steph Wilson who's insta is stephwilsonspace. I'll link to that in the show notes where she had a brass pot and used a double bagging system with two plastic bags to plant up her plant. So you've got an outer bag which goes inside the pot. At the bottom of that plastic bag goes a layer of pebbles, expanded clay pebbles, gravel, that kind of thing. And then a second bag goes in over the top of that, but the second bag has got some holes in the bottom of it. So any excess water when you water the plant runs through the holes and into that space below where the stones are, and that acts as a reservoir, which should mean that, provided you're a little bit careful with the watering, that your plant will not get waterlogged. I wouldn't recommend this for cacti and succulents, but it works great for things like Begonias and ferns and things that like to stay that little bit more moist. And what I tend to use for this are those bags that stuff gets delivered in, parcels get delivered in those thick plastic grey or black usually plastic bags. And you can just cut those up and use them to line pots. They're really strong. They don't tear easily, but you can make holes in them, so they're really good for this particular job. You can also use these bags to line pots that are not going to be waterproof, so rattan and wicker baskets are increasingly popular for houseplant pots. If you don't want to have an inner nursery pot, then line it with that thick plastic from your latest delivery. And it works an absolute treat. If you want to hide the plastic then you can add some stones or some leca to the top just to make it all look seamless. If you do that, just make sure you water towards the centre of the plant a little bit more so that you don't have water running down the sides.
Jane Perrone 16:50
Right moving on to more pot hacks. One question I get asked a lot is how to stop cats, dogs, children etc. From deciding to have a little bit of a dibble in the plant substrate on the surface of a pot. There are a few things that people will do, including putting all kinds of things onto the surface that will distract and deny access. But I have seen recently that you can now buy grid shaped guards that go over the top of pots which you can put into place with little plastic attachments, you can, I'll put a couple of links to these in the show notes, these I have seen, which I can see working quite well. They're brown, so I guess they're fairly, aren't obtrusive, if you if you choose to go down that route.
Jane Perrone 17:42
Another really common scenario with cachepots is the exact reverse of what I've been talking about, the ones that are too tall and narrow for your plant. Again, what do you do? You love this pot, but it's quite tall and narrow, so you know that your nursery pot will fit in there. But it's going to fall all the way to the bottom and the plant's not actually going to be able to be seen. And this one's pretty simple, you can just pack the bottom half or even two thirds of that tall pot with some kind of packing material to bring it up to the right size. I would always use something cheap and easy. Expanded clay pebbles are nice and light. If you want to make sure that the plant doesn't get too top heavy, you could make it something heavier like gravel, or anything you've got to hand it, I've in the past packed pots with old fabric off cuts, old plastic bags, anything you can think of will work, you just want to make sure that if you do use something like plastic bags that there is some kind of layer at the bottom so that water is caught and it doesn't end up sitting at the bottom of those plastic bags and get all yucky, but sometimes plants can look really tall when they're given that extra elevation in a taller pot. And this is the way that you can do it successfully without losing the impact of your plant, works really well if you've got quite a few pots in a group and you want to give one of them some extra height.
Jane Perrone 19:12
And my final hack isn't so much about plant pots as plant stands. Now I'm sure you've seen all of these things when you go into TK Maxx, TJ Maxx, I think it's called in the US or any of these, any department stores and places that sell planty stuff. Plant stands can be expensive, but again, we can repurpose things that we might find to make a cool plant stand. The easiest plant stand of all I think is just getting a heavy terracotta pot, turning it upside down and hey presto, there is your plant stand. If you want to paint it, you can paint it but it looks pretty nice just turned upside down. Brings that extra height to your plants and you can do that with actually with any pot at all, there's also lots of people who are spray painting what they call, I think these are more common in America than they are here, but they're called tomato cones or tomato trellises, turning those upside down so that the widest part is at the base and using those as plant stands. That's another cheap way of making a really good plant stand if you can get hold of those.
Jane Perrone 20:22
And then just look around on places like Facebook marketplace for children's stools, little wooden stools that they buy, people buy for children, again, excellent for plants. Also, nests of tables, nests of tables used to be really in fashion, they've fallen out of fashion. And people are often getting rid of them on places like Craigslist, and Freegle and Freecycle and Facebook marketplace. And you can pick them up super cheaply, way more cheaply than you would do a fancy plant stand. And again, they make a great place to give your plants that bit of extra elevation. I mean, once you go down the rabbit hole of looking on these secondhand furniture places, really the world is your oyster, people selling all kinds of amazing stuff, which you can repurpose in any number of different ways. From cake stands to umbrella stands that you can turn into amazing plant hangers. Really, if you're buying stuff new, you are missing a trick because there are so many interesting things that you can find online and go and pick up, buy from junk stores, buy from thrift stores. It's my favourite way of buying stuff. It's just it's, you feel like you, you've struck gold when you find something good. And I'd love to hear about your best secondhand finds for displaying your plants. I bet there's some of you who've got some really cool things that you've found, and repurposed. So please do share. Well, those are my pot hacks for this week. I hope you found that helpful. And perhaps I've saved you a penny or two.
Jane Perrone 22:06
And now it's time for question of the week. And this one came from Nicky on Instagram, who is having trouble with an avocado plant. And has sent a picture and yes, Nicky, I can see exactly what you mean. It has no leaves. Nicky writes that it was always quite bare up the stem and had leaves on the top. But now as you can see in the picture, it's all gone. I'm not sure what to do. I've grown it for the past three years from an avocado pip. Well, this is a troubling matter when a plant loses all its leaves. You know, it's not ideal in most circumstances. Now listeners who've been with the show for a very long time will remember back in the early days, I did an episode about how to grow an avocado stone from a pip using my, I call it the giant sloth technique, wrapping the stone in some paper towel, damp paper towel and then putting it in a Ziploc bag to try to emulate conditions that might have occurred when the giant sloth which, a long long time ago was the main spreader of avocado seeds, they'd eat them and then poop out the seeds, that you know the seeds would be germinating in this giant sloth poo. So you're emulating the giant sloth poo environment. I don't know how you started this one off Nicky. But obviously it was going okay. But things have gone pear shaped apparently the stem is still green and healthy. I would say this is not a lost cause in that case, Nicky. I wonder whether there's been some root rot going on. To be honest, for a three year old plant, it doesn't look that big, it looks about 20 to 30 centimetres tall, I suspect it hasn't been getting enough light. And over time a bit of root rot has set in hence the plant has lost all its leaves. But there is hope. I mean, you can definitely say that there is chance for this plant. I would take it out of the pot, check the roots for any rot, any areas that the roots look like they've kind of wasted away and aren't firm and cut that away. Repot in some fresh substrate and maybe just trim that stalk a little bit, maybe up to half and see if it re-sprouts, there's a good chance it will. If not, and maybe at the same time as a backup plan. I would start sprouting a new avocado stone or two because it's a freely available thing. I mean most of us eat avocados or if not, we can find a friend who does and just start sprouting some more because that way you've got a backup plan. If the first one doesn't start sprouting Persea americana, the avocado, does need quite a lot of light. My son has been growing one in the last few months and his one is on our south facing window in a big bay window over the winter because it's not going to get burnt over winter. The light isn't that strong. I'll probably move it off there in the height of summer, but it's doing very well. But we do wait for it to pretty much feel completely dry that substrate at the moment before we water again, because the risk of root rot is a lot worse than the plant getting too dry and wilting a bit. So I think there is hope but yeah, with the joy of doing anything like this where you're just growing it from a seed and you haven't spent a load of money at a chichi house plant shop, you're not going to have to worry too much about the costs involved. So get sprouting. Try again and see what happens with your existing plant. And hopefully Nicky you'll have a whole forest of avocados before you know it. I hope that helps and if you've got a question for On The Ledge do drop me a line ontheledgepodcast@gmail.com is the best way to get in touch.
Jane Perrone 26:09
That is all for this week's show. I will be back next Friday with more house planty content just for you. Bye.
Jane Perrone 26:36
The music you heard in this episode was Roll Jordan Roll by the Joy Drops, The Road We Used To Travel When We Were Kids by Komiku and Dizzy Spells by Josh Woodward. All tracks are Licenced under Creative Commons visit the show notes for details.
Whether you’re coping with wrongly-sized cachepots or containers with no drainage, I have a solution for you! Plus I answer a question about a sad avocado plant.
Check out the show notes below as you listen…
If you have a beautiful cachepot (outer pot) that is too shallow and wide for your plastic nursery pot, the easiest option is to cut down the plastic pot using sturdy scissors or a junior hacksaw. Sand down the cut edge if it’s sharp.
If the nursery pot in question already has a plant in it, you will need to trim the roots of the pot: this should work fine on any plant that isn’t a young seedling.
If you have plastic containers you can spare, you may be able to find a pot that is shallower than the average nursery pot: it’s fine to use these, but add drainage holes using a bradawl, sharp scissors or similar.
Pack stones or dry substrate around the plastic pot to fill any large gaps between the nursery pot and cachepot.
I learned from Tom Cranham, listener and Begonia grower extraordinaire, that for certain plants you can add air circulation to plant roots by adding extra holes to regular nursery pots round the sides. This works well for Begonias and some orchids.
If you don’t want to use a nursery pot but plant straight into a cachepot, you can add drainage holes to pottery, china and terracotta pots fairly easily - just don’t try this with expensive/heirloom pots!
Method one involves a bucket full of water, a phillips head screwdriver, a hammer and a rag. Stuff the rag into the pot, then place base up in the bucket so all the air is gone from the inside of the pot. Use the hammer to tap the screwdriver until a hole is made in the base: repeat until you have enough holes. Start gently and increase the power as each pot will vary as to how much force is needed!
Method two needs a ceramic drill bit, available from DIY stores, fitted to your drill. Place the pot base down onto a padded surface (a rag or old cushion on the floor outside is ideal, just in case you use a bit too much force). March the spots you want the holes to go, wet the base then drill until holes are made. The drillbit will heat up, so take regular breaks to check progress.
If you have cachepots with newly-drilled holes that now need a saucer, I love old glass microwave plates, odd plates from the charity shop, and terracotta saucers. The latter are usually sold not waterproofed, so you will need to waterproof them with some clear acrylic spray. (I didn’t mention this in the episode but you can also use tung oil for this purpose).
If you have a precious cache pot that you can’t alter, or a brass pot that won’t take kindly to the methods above, you can try Steph Wilson’s double bagging approach - one bag lines the pot, with a layer of stones or leca at the base: the second bag goes on top, with some holes made in it. Then the plant is planted into the inner bag, and excess water goes into the layer of stones and does not rot the roots. This is ideal for Begonias and ferns, but may not work for succulents. The plastic bags used for delivery parcels are idea.
If you are trying to keep pets and children out of the tops of pots, you can add stones, but I recently saw these plastic grids which are secured with pegs which may be worthwhile for the most persistent offenders!
If you have a tall pot you want to use as a cachepot to give a plant extra height, stuff something in the base - from rags to stones to plastic bags.
Plant stands are expensive new but try repurposing small stools, cake stands, and nests of tables, or just turn a large terracotta or china pot upside down!
QUESTION OF THE WEEK
Nicky got in touch about a sad three-year-old avocado plant which had lost all its leaves, although the stem is still green. I suspect this plant is not in enough light, and has been given slightly too much water over the winter season. I would suggest checking the roots, removing the substrate and repotting, trimming the bare stem by up to half to see if it will re-sprout.
As an insurance policy, sprout some more avocado seeds - you have nothing to lose! My favoured approach is to wrap a washed stone in damp paper towel, stick it in a clear plastic bag and place somewhere dark and warm until it sprouts, then pot up. Avocadoes (Persea americana) need a fair amount of light so place in a south facing spot over winter, moving it further from the window in summer.
Want to ask me a question? Email ontheledgepodcast@gmail.com. The more information you can include, the better - pictures of your plant, details of your location and how long you have had the plant are always useful to help solve your issue.
HOW TO SUPPORT ON THE LEDGE
Contributions from On The Ledge listeners help to pay for all the things that have made the show possible over the last few years: equipment, travel expenses, editing, admin support and transcription.
Want to make a one-off donation? You can do that through my ko-fi.com page, or via Paypal.
Want to make a regular donation? Join the On The Ledge community on Patreon! Whether you can only spare a dollar or a pound, or want to make a bigger commitment, there’s something for you: see all the tiers and sign up for Patreon here.
The Crazy Plant Person tier just gives you a warm fuzzy feeling of supporting the show you love.
The Ledge End tier gives you access to two extra episodes a month, known as An Extra Leaf, as well as ad-free versions of the main podcast on weeks where there’s a paid advertising spot, and access to occasional patron-only Zoom sessions.
My Superfan tier earns you a personal greeting from me in the mail including a limited edition postcard, as well as ad-free episodes.
If you like the idea of supporting On The Ledge on a regular basis but don't know what Patreon's all about, check out the FAQ here: if you still have questions, leave a comment or email me - ontheledgepodcast@gmail.com. If you're already supporting others via Patreon, just click here to set up your rewards!
If you prefer to support the show in other ways, please do go and rate and review On The Ledge on Apple Podcasts, Stitcher or wherever you listen. It's lovely to read your kind comments, and it really helps new listeners to find the show. You can also tweet or post about the show on social media - use #OnTheLedgePodcast so I’ll pick up on it!
CREDITS
This week's show featured the tracks Roll Jordan Roll by the Joy Drops, The Road We Use To Travel When We Were Kids by Komiku and Dizzy Spells by Josh Woodward.